Friday, July 8, 2011

Blast Off! - Cork Rockets

Watching today's final launch of the space shuttle Atlantis sparked a million questions and re-enactments.  My husband answered the questions and did this shuttle inspired project with the boys.


You need 6 wine corks, toothpicks and a small screwdriver (for eye glasses) or even a nail will work.
Parents (or an older child with guidance), carefully press a hole into the top of a cork about 1/2 inch deep.
Break a toothpick in half, then insert the thicker half into the hole (halfway).

Next, press a hole into the top of another cork, then add them together by pressing the other end of the toothpick into the hole. Repeat these steps until three corks are attached to each other.
Now take the fourth cork and pres a hole into the side toward the top. Then add half a toothpick.
Press a hole on the side, toward the bottom of the three attached corks, and connect the forth cork to it.
 Repeat this step with the other two corks.

Now have your child paint the rocket (tempera paint) or even color the rocket with markers.

Now go to the moon! If you use paint and your child is a little impatient while it drys, you can visit www.nasa.gov and watch real shuttle footage and missions to space. The boys loved it!

Thursday, July 7, 2011

Bowling Excursion

Did I say bowling?  Yes, bowling.  I haven't been bowling in years, but why not?  Especially when you hear about this great deal  My awesome friend Karin told me about this one.  Go to:
www.kidsbowlfree.com, and sign up.  I was reluctant, but it has been a few weeks now and no spam.  This is the real deal.  Choose a participating bowling alley, and they will send you weekly coupons for free bowling. 

Now, there is a tiny catch.  Parents have to pay.  After signing-up you will be offered a deal - pay $25.00 for unlimited adult bowling for the summer.  This deal allows you to bring 2 adult guests.  If you know you will always go with another family, just one family should buy the adult bowling.  Then split the $25 fee, and bowl together all summer long - and never pay for the kids!

Cheap, old-fashioned fun!

Wednesday, July 6, 2011

Frozen Banana Cream Squares


Today we made these delicious frozen treats.  These squares are easy, and very kid-friendly.  By the way, the crumb crust is standard and can be made using any kind of cookie (including graham crackers).


Ingredients:
8 oz. vanilla wafer cookie crumbs (we used the Trader Joe brand and it took 50 cookies)
4 oz. sugar
2 oz. butter, melted + a little extra for the baking dish
2 3.39 oz packages of instant vanilla pudding (the Trader Joe brand is really good!)
5 medium bananas (after being mashed, about 16 oz.)

Line a 13 x 9” baking pan with parchment paper, allowing the parchment to spill over the sides of the dish.  Brush the paper with the extra melted butter.

Combine the cookie crumbs and the sugar.  I like to use a whisk to make sure it gets all "mixed in".   Pour in the melted butter and stir together.
Firmly press the cookie mixture into the parchment-lined baking dish, refrigerate for about 1 hour.

Mash the bananas. 
Make the pudding, following the package directions. 

Spread the mashed banana over the cold crust.  Pour the pudding over the mashed banana.

Freeze for at least 4 hours.

Using the sides of the parchment like handles, pull the frozen banana cream out of the dish.  Place it on a cutting board and slice into squares.

If you eat these right out of the freezer, they can just be picked up by hand.  Or, let the squares sit for a few minutes and eat using a fork.  If you want to get fancy, top with a little whipped cream and drizzle with chocolate syrup.

We ate them plain, super yummy.  The kids helped with every step of this one!
 Brushing melted butter onto the parchment.
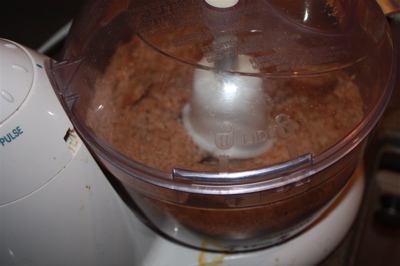
 Crushing the cookies in the food processor. 
 Whisking the crumbs and the sugar.
 Pressing the cookie-crumb mixture into the baking dish.
 Mashing the bananas.
 Spread the mashed bananas onto the crumb crust. 
 Pour the pudding over the mashed bananas, and freeze.
 Use the parchment "handles" to pull the banana cream out of the dish.
Slice into squares, and serve. 


Yum!  Let me know how it goes, blog@klinecreative.com 

Please remember, this recipe is flexible.  Make adaptions, and tell me how to make it even better.